Saturday, September 14, 2013

Skinny Broccoli and Chicken Casserole

In my effort to try a new recipe every week, I came across this Gem. Low Calorie, easy and oh so yummy.


Ingredients:

4 Boneless, Skinless Chicken Breast
1 lb of Broccoli (or 2 Steamfresh bags of Broccoli Florets 12 oz each)
1.5 can of Cream of Broccoli (or Mushroom) Condensed Soup (98% fat free)
1/3 cup of Milk (low or no fat)
2 cups of shredded Cheese (I used Mexican reduced fat)
1 cup Panko Bread Crumbs (italian style)

Directions:
Preheat oven to 350 degrees
1. Boil Chicken and cut into large bite sized chunks (do not overcook)
2. Steam broccoli
3. Mix soup and milk  
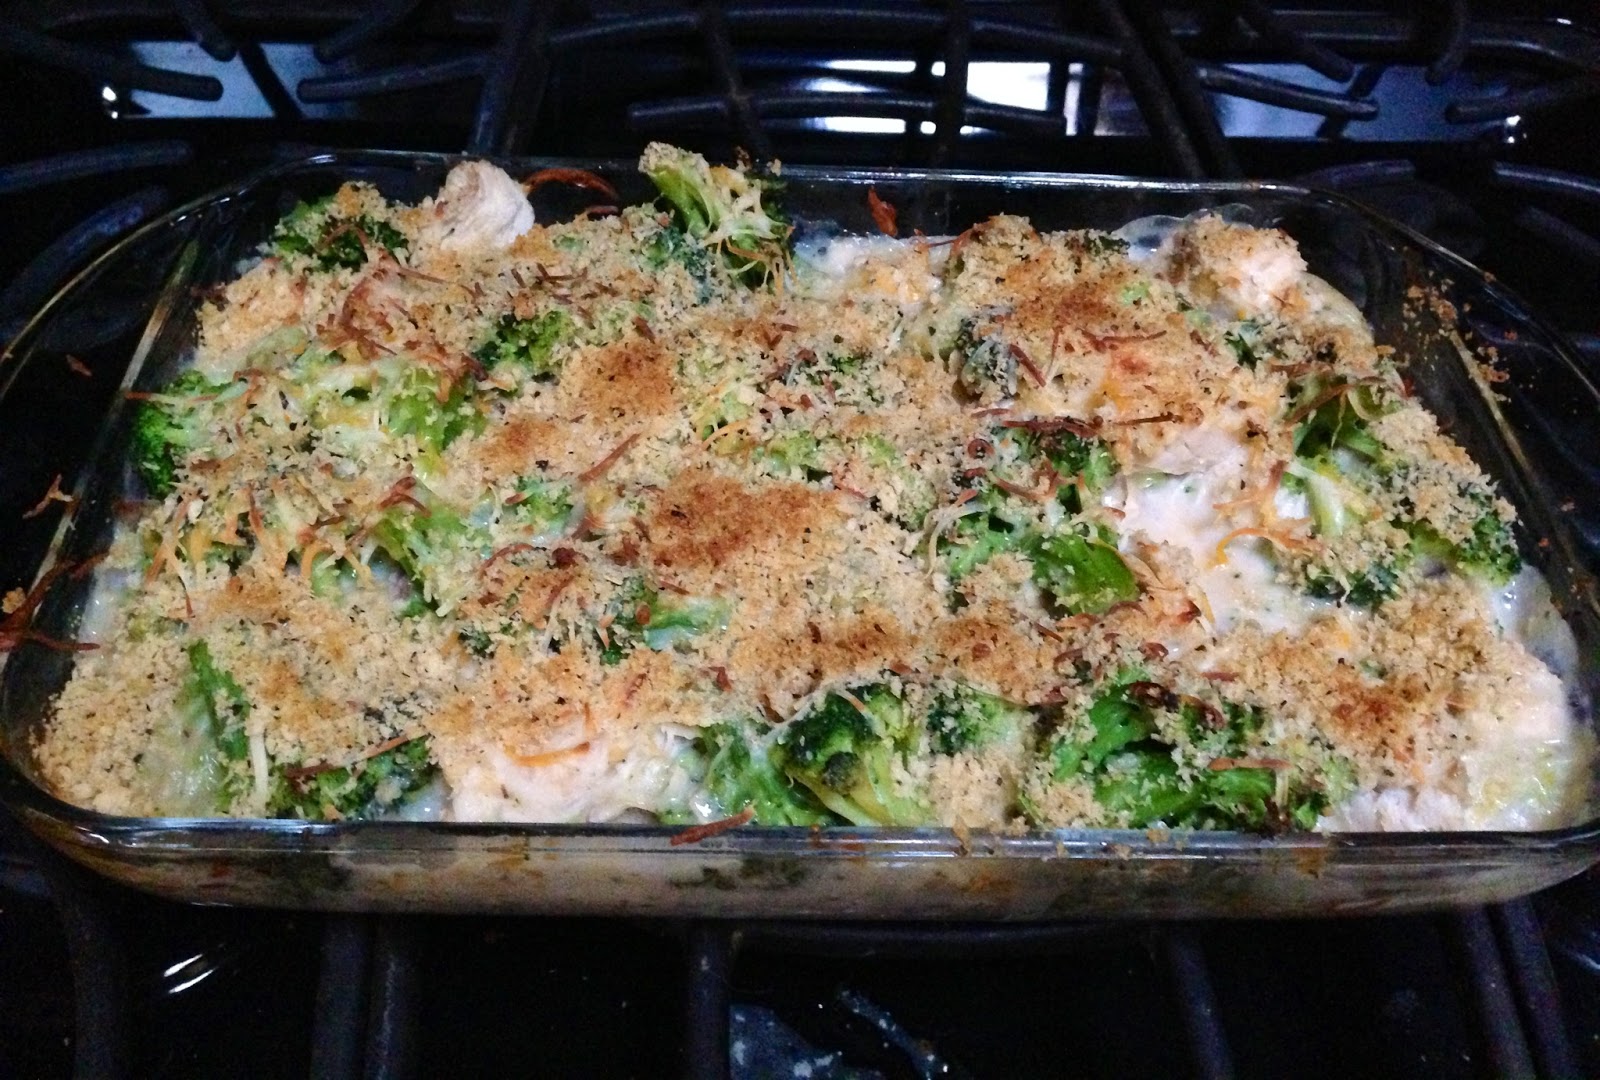
4. Layer broccoli, chicken, soup mixture and cheese in a casserole dish
5. Sprinkle bread crumbs on top
6. Heat in a 350 degree oven for about 20-30 minutes or until bubbly (I did the last few minutes on broil to make the bread crumbs crispy)


Nutritional Information:


User Entered Recipe
  6 Servings

Amount Per Serving
  Calories 315
  Total Fat 11 g
      Saturated Fat 5.9 g
      Polyunsaturated Fat 0.3 g
      Monounsaturated Fat 1.3 g
  Cholesterol 66.3 mg
  Sodium 692.5 mg
  Potassium 49.2 mg
  Total Carbohydrate 19.8 g
      Dietary Fiber 4.0 g
      Sugars 4.3 g
  Protein 31.4 g


Wednesday, March 6, 2013

Under $20 Craft Project

After my daughter moved into her own apartment closer to college, I was left with a bedroom and bathroom full of teenage "stuff". I decided to do a one day makeover and turn it into a guest room. Since I needed something to fill up the wall over the bed, I did this easy craft project for under $20 and it took me less then an hour. 

I started with an old piece of scrolled iron, some cork tiles, scrap book paper and some modge podge...


Here is the finished project!


 Here are the before and afters...


Sunday, January 6, 2013

Leftover Lunch Puffs!

I had some leftover Spinach and Artichoke dip and a few pieces of Deli Turkey that I didn't want to throw out, Nick said, "What's for lunch???" so here is what I came up with....

Ingredients:
1 Package Crescents
Deli Turkey
Artichoke/Spinach Dip (or I think Laughing Cow wedges with chopped spinach or even asparagus would work too)

Step one...
Flatten the Dough and add the Turkey and Dip


Step two...
Wrap it Up....


Step three....
Bake at 365 degrees for about  14 minutes....


Enjoy!


Sunday, August 12, 2012

Kitchen Remodel Complete

As promised here are the before and after pictures...

BEFORE: Dated cabinets, awful tile on the counters and floors and it was closed off from the living room. Oh and look at that classy light fixture...


DURING: The wall came down but you can still see the awful floor and carpet.


AFTER: Now it is one open space.


I am so thankful for my amazing husband, who did all of this by himself... I am blessed!


Wednesday, June 6, 2012

Easy Berry Cobbler...

Here is another Pinterest success story... 

Ingredients:


2-3 bags frozen berries
1 white cake mix
1 can of diet 7-up or Sprite


Easy as:
 1. Spray the pan with non-stick spray and toss in the berries  (I used 2 bags, next time I will use 3)


2. Combine the cake mix and soda and pour over the top of of the berries.

3. Bake at 350 degrees for 45-50 minutes or until toasty brown

Enjoy with some ice cream ... Mmmmm

Monday, May 21, 2012

A Grad Gift for Tyler

As my addiction to Pinterest grows, I have actually started creating some of the great things that I pin. Here is the most recent. A very simple graduation gift. Instead of giving cash in a card, Why not give a money dispenser. Here is how:

You will need:
Tape
Cash
Kleenex Box
Paper

Step One:

Tape the Dollar bills together lengthwise and then roll them up. I left enough space between the bills so that they can be easily cut apart.


Step Two:

Attach one tissue to the end of the roll and then put the roll in the box with only the tissue showing. I put a little sign that said pull when needed. Here is the finished product... By the way, Tyler is a fisherman, so this box was a perfect find...


Wednesday, May 9, 2012

Post-it Notes

One of my besties made me a Post-it holder for my birthday... I love it so much i decided to make one for a friend... This is my version.


It is super easy to make... just a pretty piece of paper, a plastic frame, a tag, some puffy letters, ribbon and a Post-it pad... Hot glue it all together and VOILA, adorable gift.